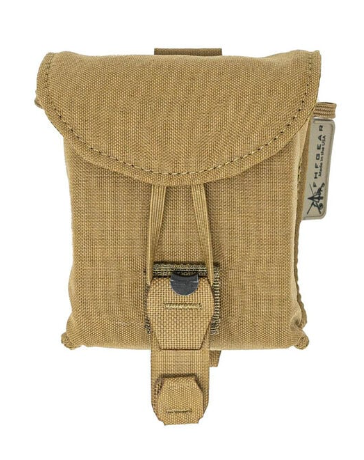
Rangefinder Pouch 2.0 Overview and SetupUpdated 16 days ago
 Let's walk you through the Rangefinder 2.0 and the different ways you can attach it to our foundation systems!
One of the key upgrades to the Rangefinder 2.0 is the integrated MOLLE system on the back, which includes two equipment fasteners for a secure and customizable attachment. You have two options for mounting the Rangefinder 2.0 to your harness:
- Using the MOLLE Equipment Fasteners for a side-mounted setup.
- Attaching to the side buckle, the more traditional method.
Let’s go over both methods in detail.
Method 1: Attaching with MOLLE Equipment Fasteners
Prepare Your Harness:
- Remove your binos from the harness for easier access.
- Locate the gaps on the side panel of the harness where the fasteners will be inserted.
Insert the Equipment Fasteners:
- Start with the back fastener by threading its upper arm through the upper gap on the harness.
- Insert the lower fastener through the lower gap, just below the elastic band.
- Repeat the process for the front fastener, ensuring they overlap for a secure hold.
Tighten & Secure:
- Pull everything snug to ensure a tight, stable fit.
- Your Rangefinder 2.0 is now securely mounted to the side of your bino harness.
Method 2: Attaching to the Side Buckle (Traditional Pro-M Method)
Prepare the Rangefinder 2.0:
- From the back of the pouch, set the MOLLE straps aside.
- Skip the first row of MOLLE and lock in the second row, creating a loop for the buckle to sit in.
Position for a Right-Handed Shooter:
- Unbuckle the side buckle of your harness.
- Use one of the included equipment fasteners or an FHF Gear webbing management keeper (both work the same).
- If using an equipment fastener, you may need to trim it down for a better fit.
Secure the Rangefinder Pouch:
- Slide the fastener between the female buckle and elastic strap.
- Position the Rangefinder 2.0 through the loop you created with the MOLLE system.
- Snap in the male buckle to secure the pouch in place.
Final Adjustment:
- Slip the Velcro fastener through the gap between the male buckle and webbing.
- Pull it tight and attach the Velcro strap to the backside of the pouch to prevent movement.
Now, your Rangefinder 2.0 is locked onto the side buckle, ensuring it won’t migrate or shift during use.
Method 3: Attaching Your Rangefinder Pouch Using a Webbing Management Keeper
This setup works with:
- The original rangefinder pouch with a belt loop.
- Any new accessory pouches with the MOLLE system by creating a one-inch webbing loop for the buckle.
Step 1: Prepare Your Harness & Keeper
- Flip your harness or chest rig over for easy access.
- Unbuckle the side strap where you want to attach the rangefinder pouch.
Step 2: Attach the Keeper
- Take either the original style keeper or the new webbing management keeper and slide it through the gap between the elastic strap and the buckle.
- If you're using a new accessory with MOLLE, first weave the MOLLE webbing into a one-inch loop to create an opening for the buckle.
Step 3: Secure the Rangefinder Pouch
- Slide the side buckle through the belt loop on the rangefinder pouch.
- Take the male buckle and snap it back into place.
Step 4: Lock in the Keeper
- Take the other end of the webbing management keeper and slide it between the gap of the buckle and the webbing.
- Fold the keeper over onto itself to lock everything in place.
As always, don't hesitate to let our team know if you have any questions or are still struggling to attach your Rangefinder 2.0 Pouch. Also, make sure to watch through the videos below for a detailed walkthrough of how to setup and attach your new rangefinder pouch!